# Social Data
The **Social Data** feature allows you to gather and use valuable data from **Facebook fanpages, groups, and profiles** to create precise audiences for your campaigns. Follow these steps to efficiently leverage social data for targeted marketing.
## Step 1: Access Social Data
* Go to the **Big Data** section in the eMailBase dashboard.
* Select **Social Data** from the menu.
{% hint style="warning" %} **NOTE:**\
If you cannot find a suitable target customer list, you can use the [Get Data feature from Facebook](https://emailbase.gitbook.io/english/basics/bigdata/broken-reference) to retrieve any data you need from Fanpages | Groups | Profiles.
{% endhint %}
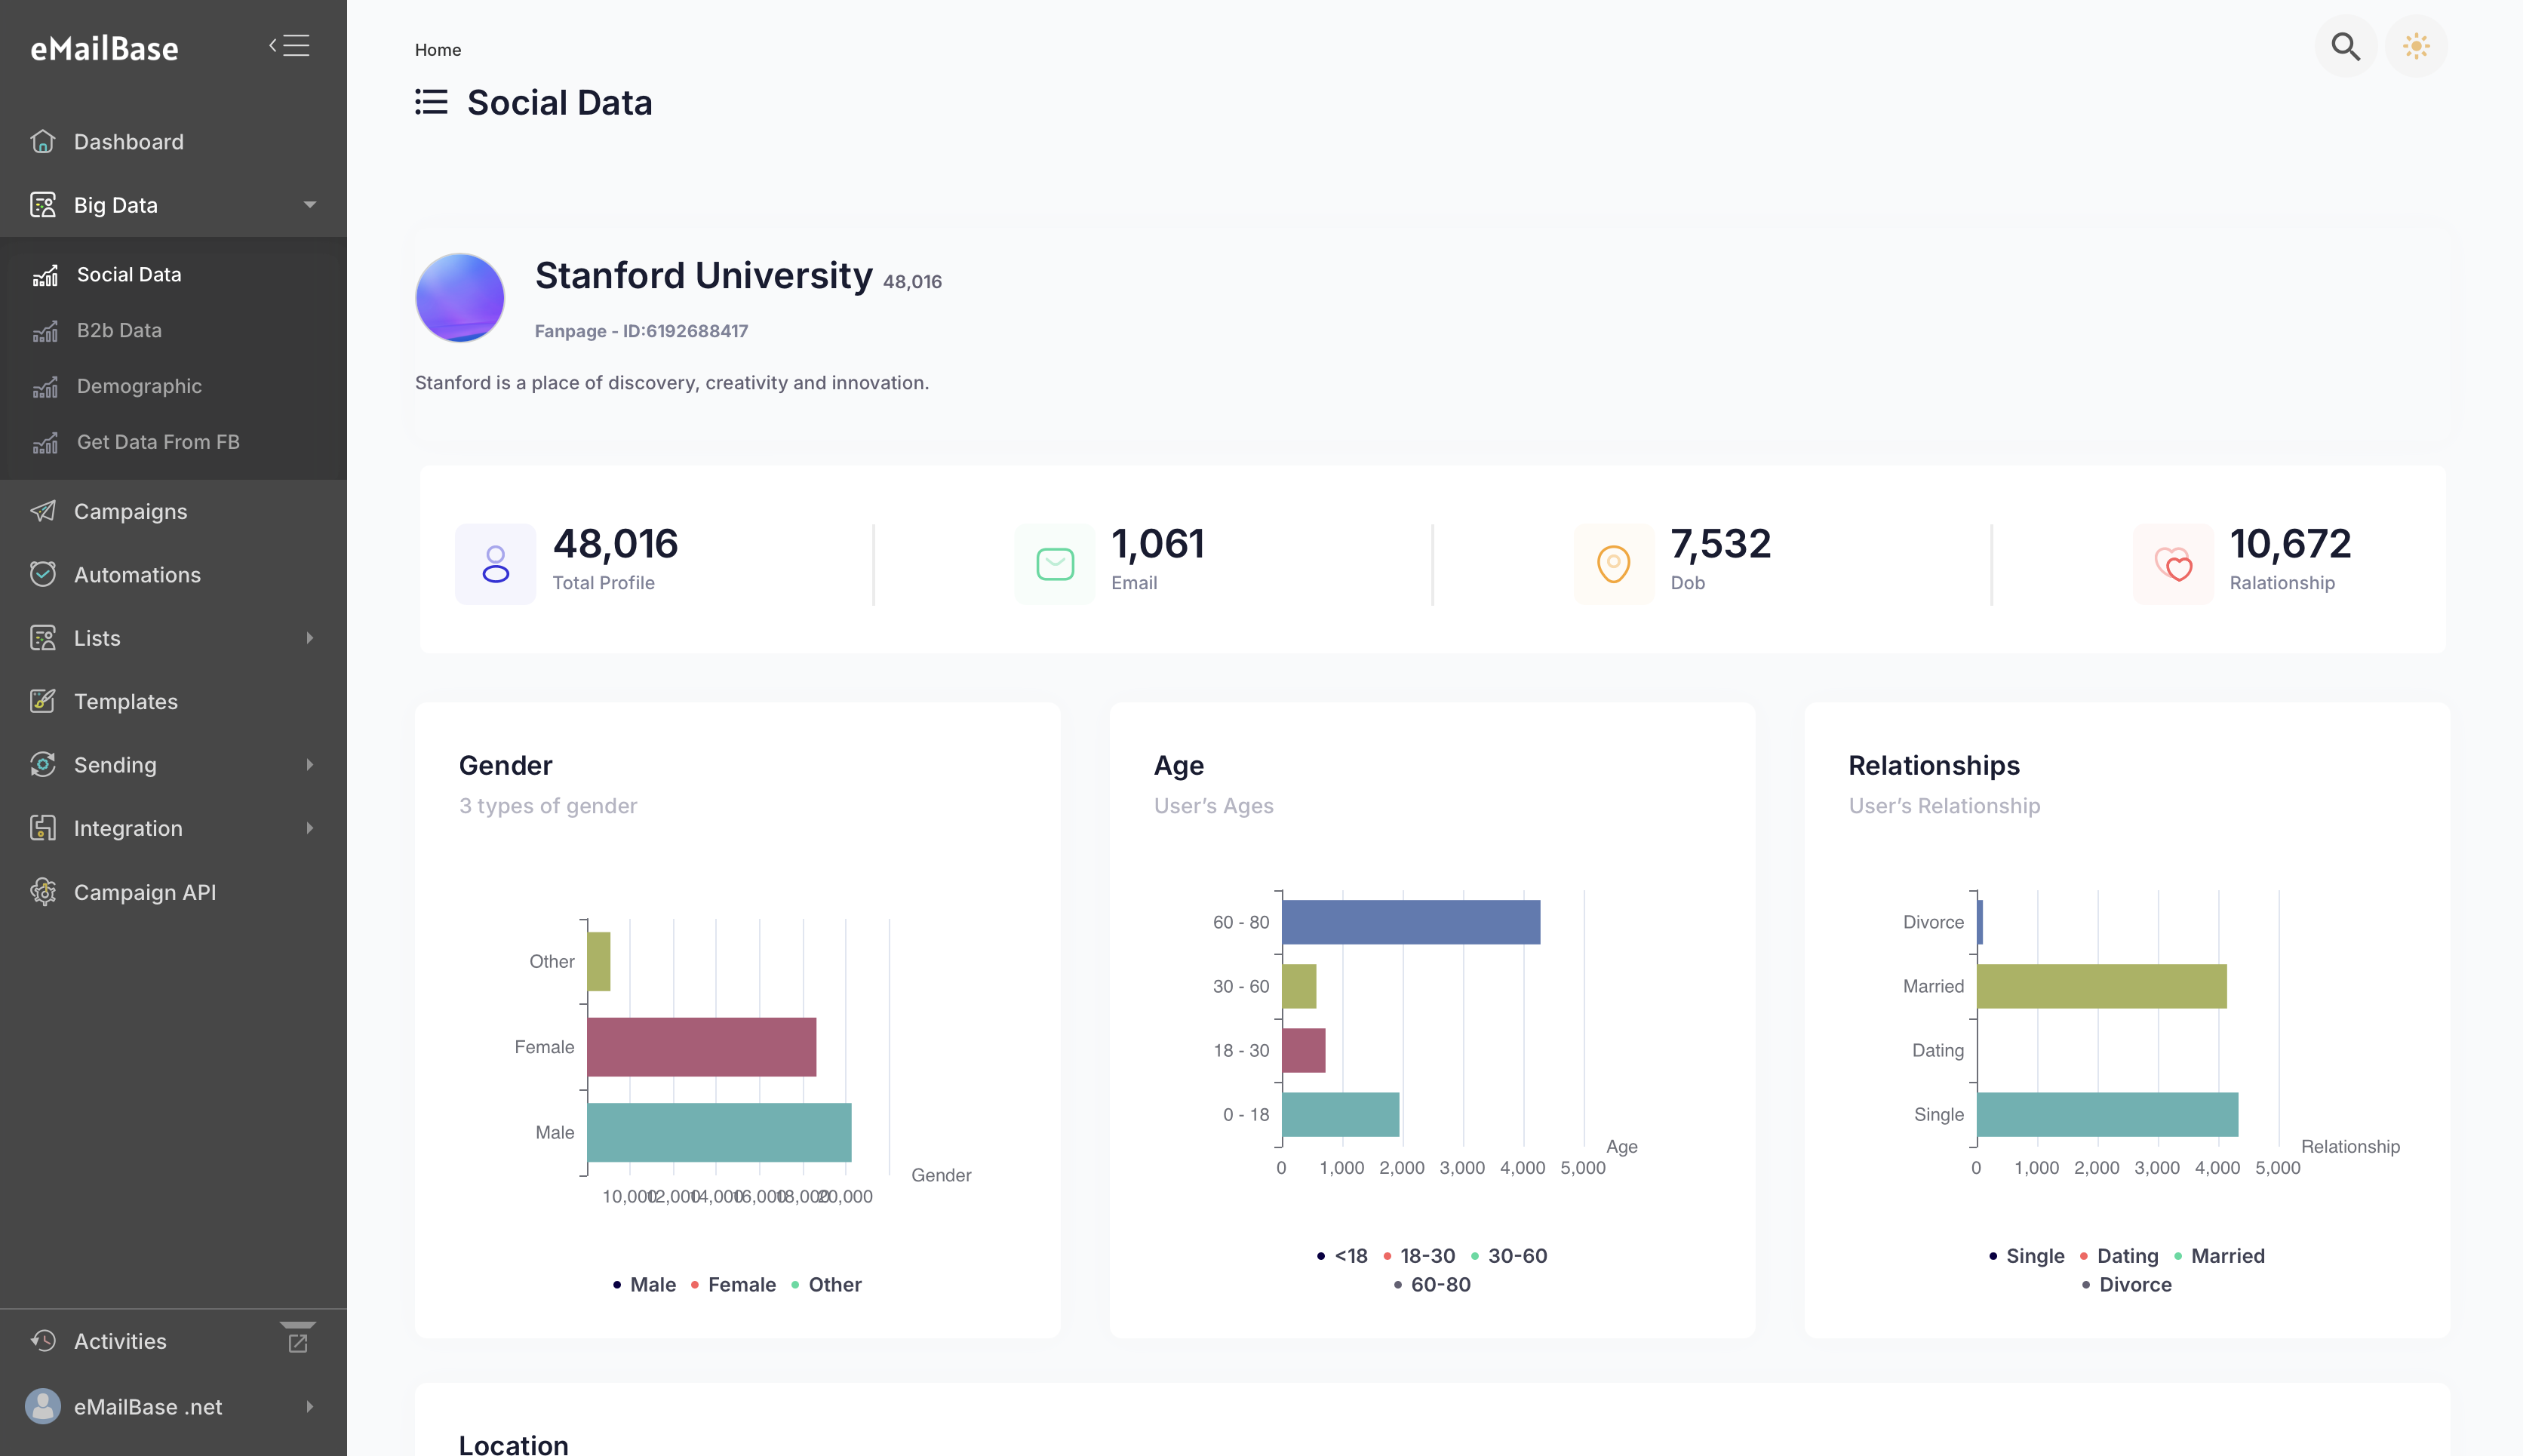
## Step 2: Search for Desired AudienceAudiences
* Use the **Search bar** to find the specific **Audiences** you want, including data from Facebook fanpages, groups, or profiles.
* Apply relevant filters to narrow down the data. For example, you can filter by demographics like age, gender, location, and other interests to tailor the audience to your campaign's needs.
* In the **Domain Name** field, you can further refine your search by filtering email providers (e.g., filter for `@gmail.com`).
## Step 3: Import BigData to create customer lists for email recipients
* Once you have filtered and refined the audience segment, click the blue button next to the audience segment to copy the **Segment ID**.
## Step 4: Select List for Import
* Choose the **List** where you want to import the filtered data.
> *See detailed instructions for creating Lists* [*here*](https://emailbase.gitbook.io/english/basics/list)*.*
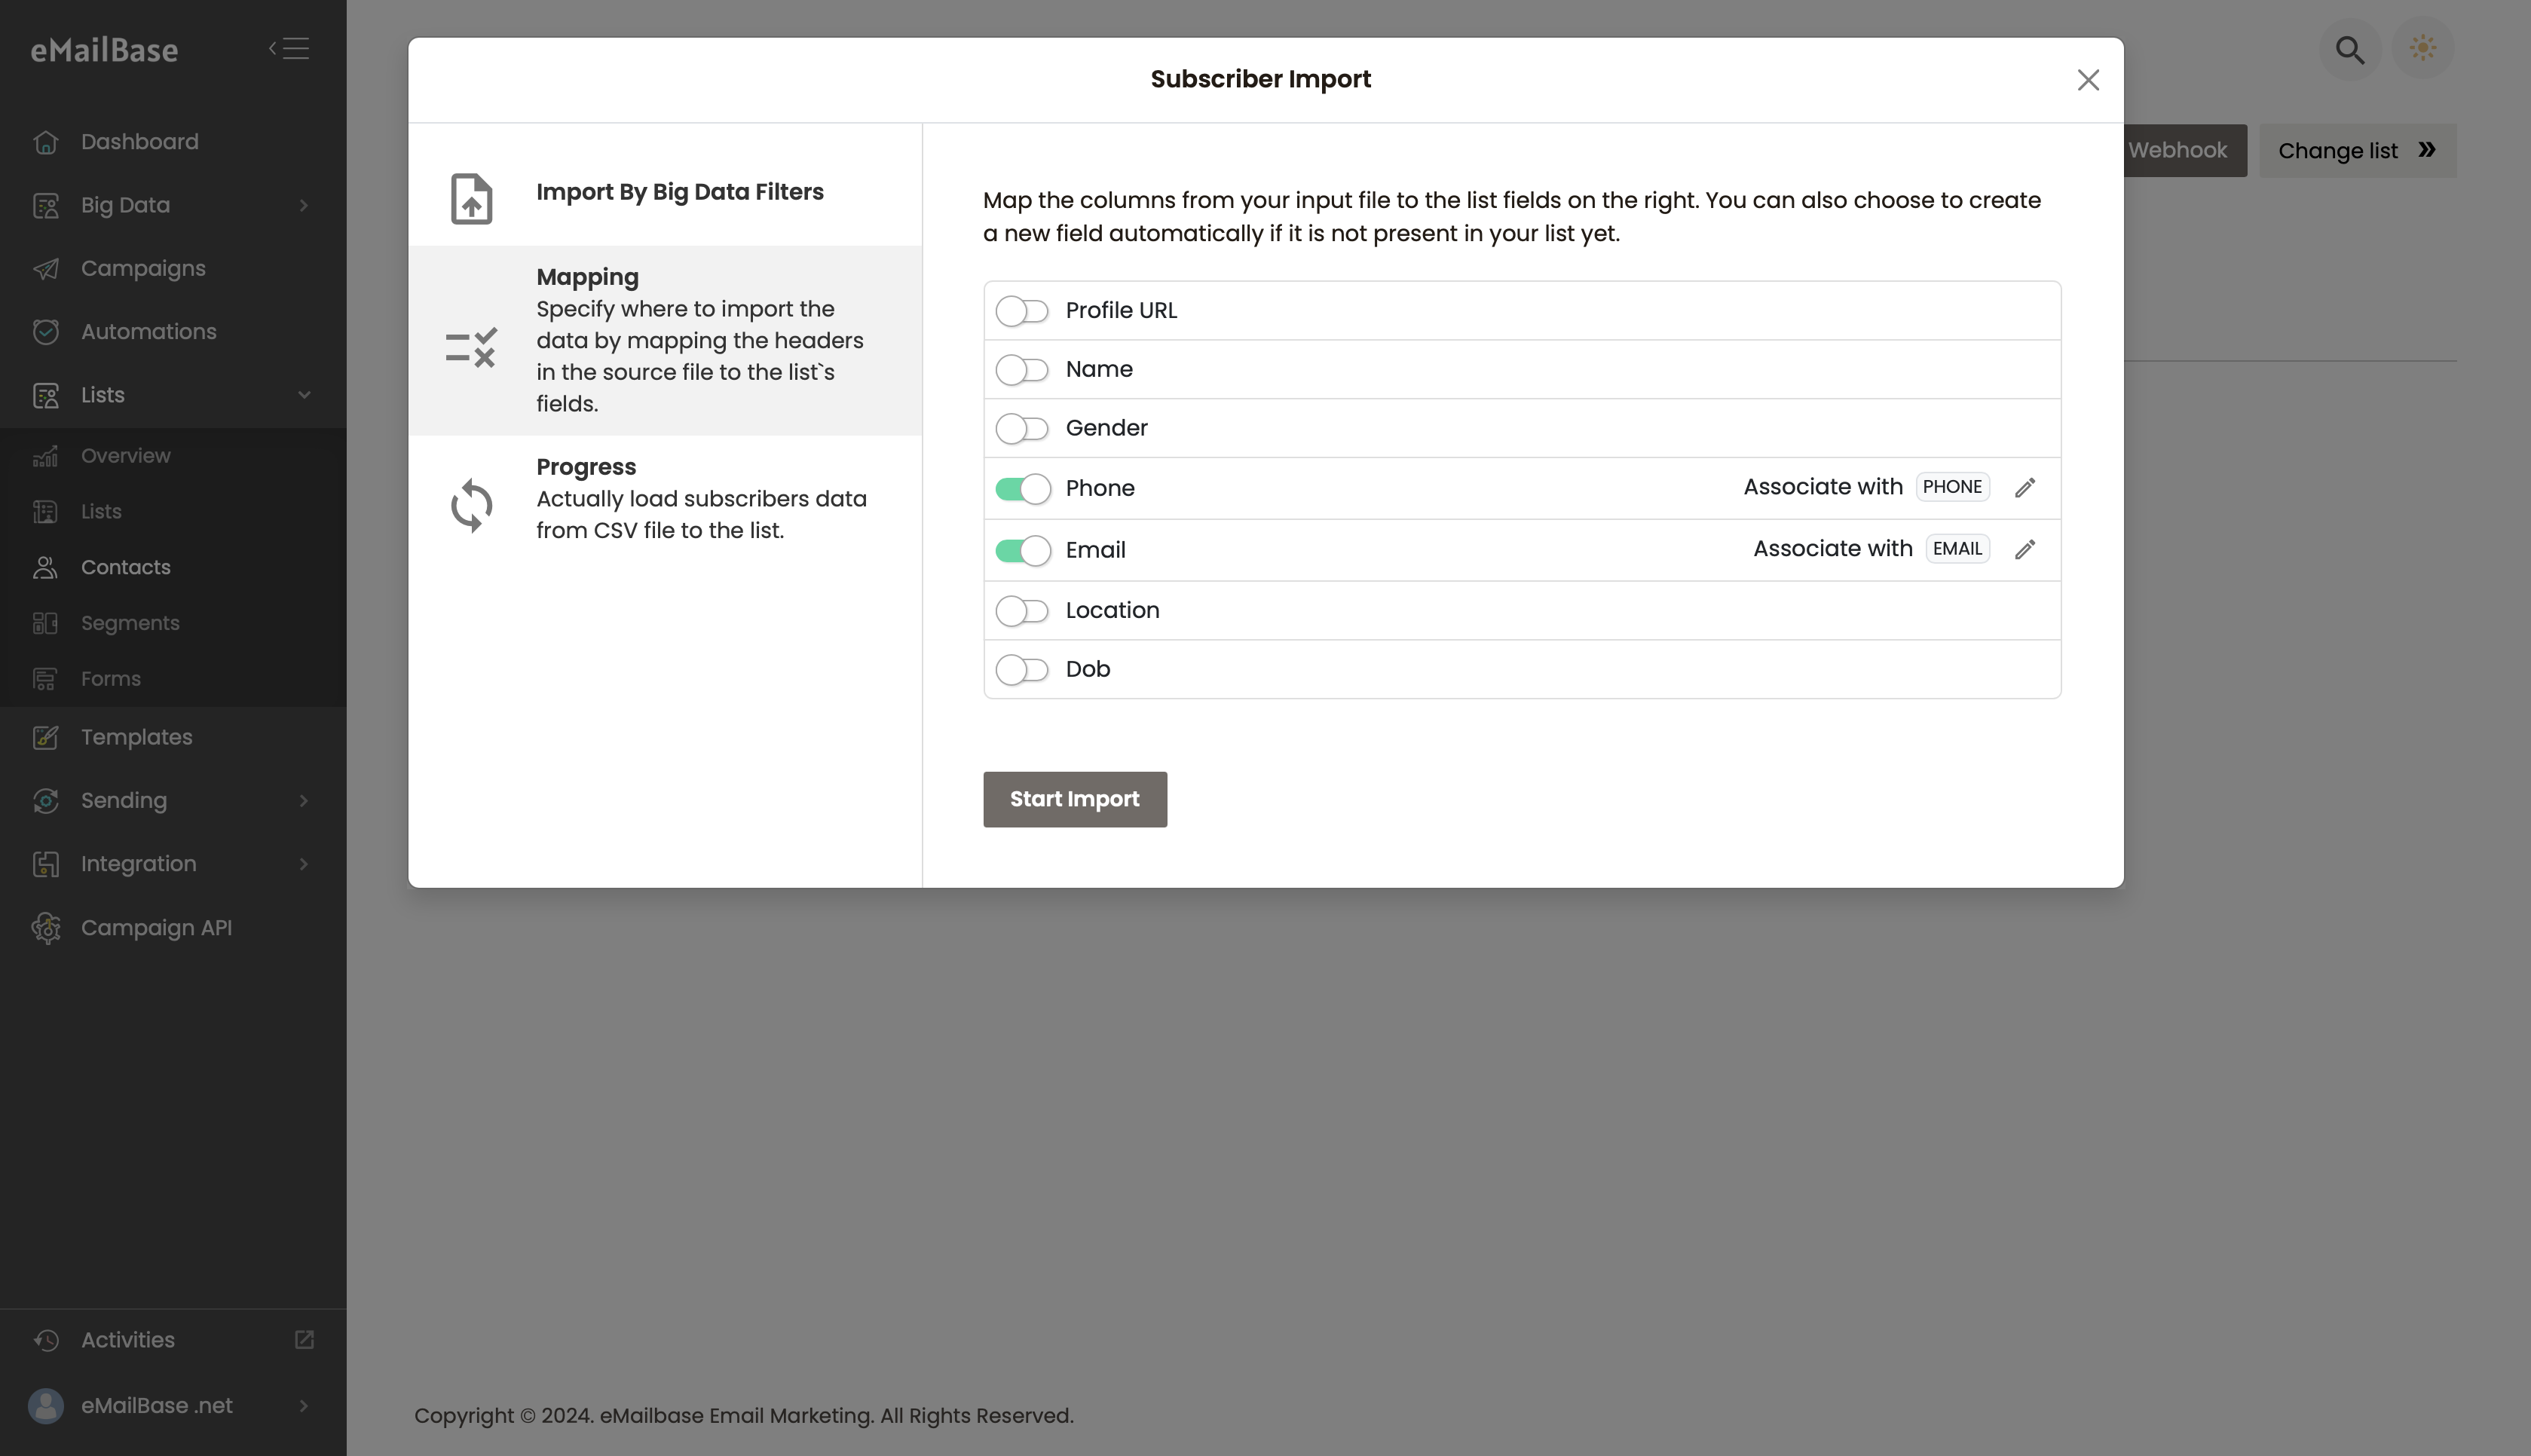
## **Step 5: Import Data**
* Navigate to **Subscribers** > **Big Data** and click **Start Import**.
* Paste the **Segment ID** you copied earlier into the appropriate field.
* Select the fields you want to import from the segment data.
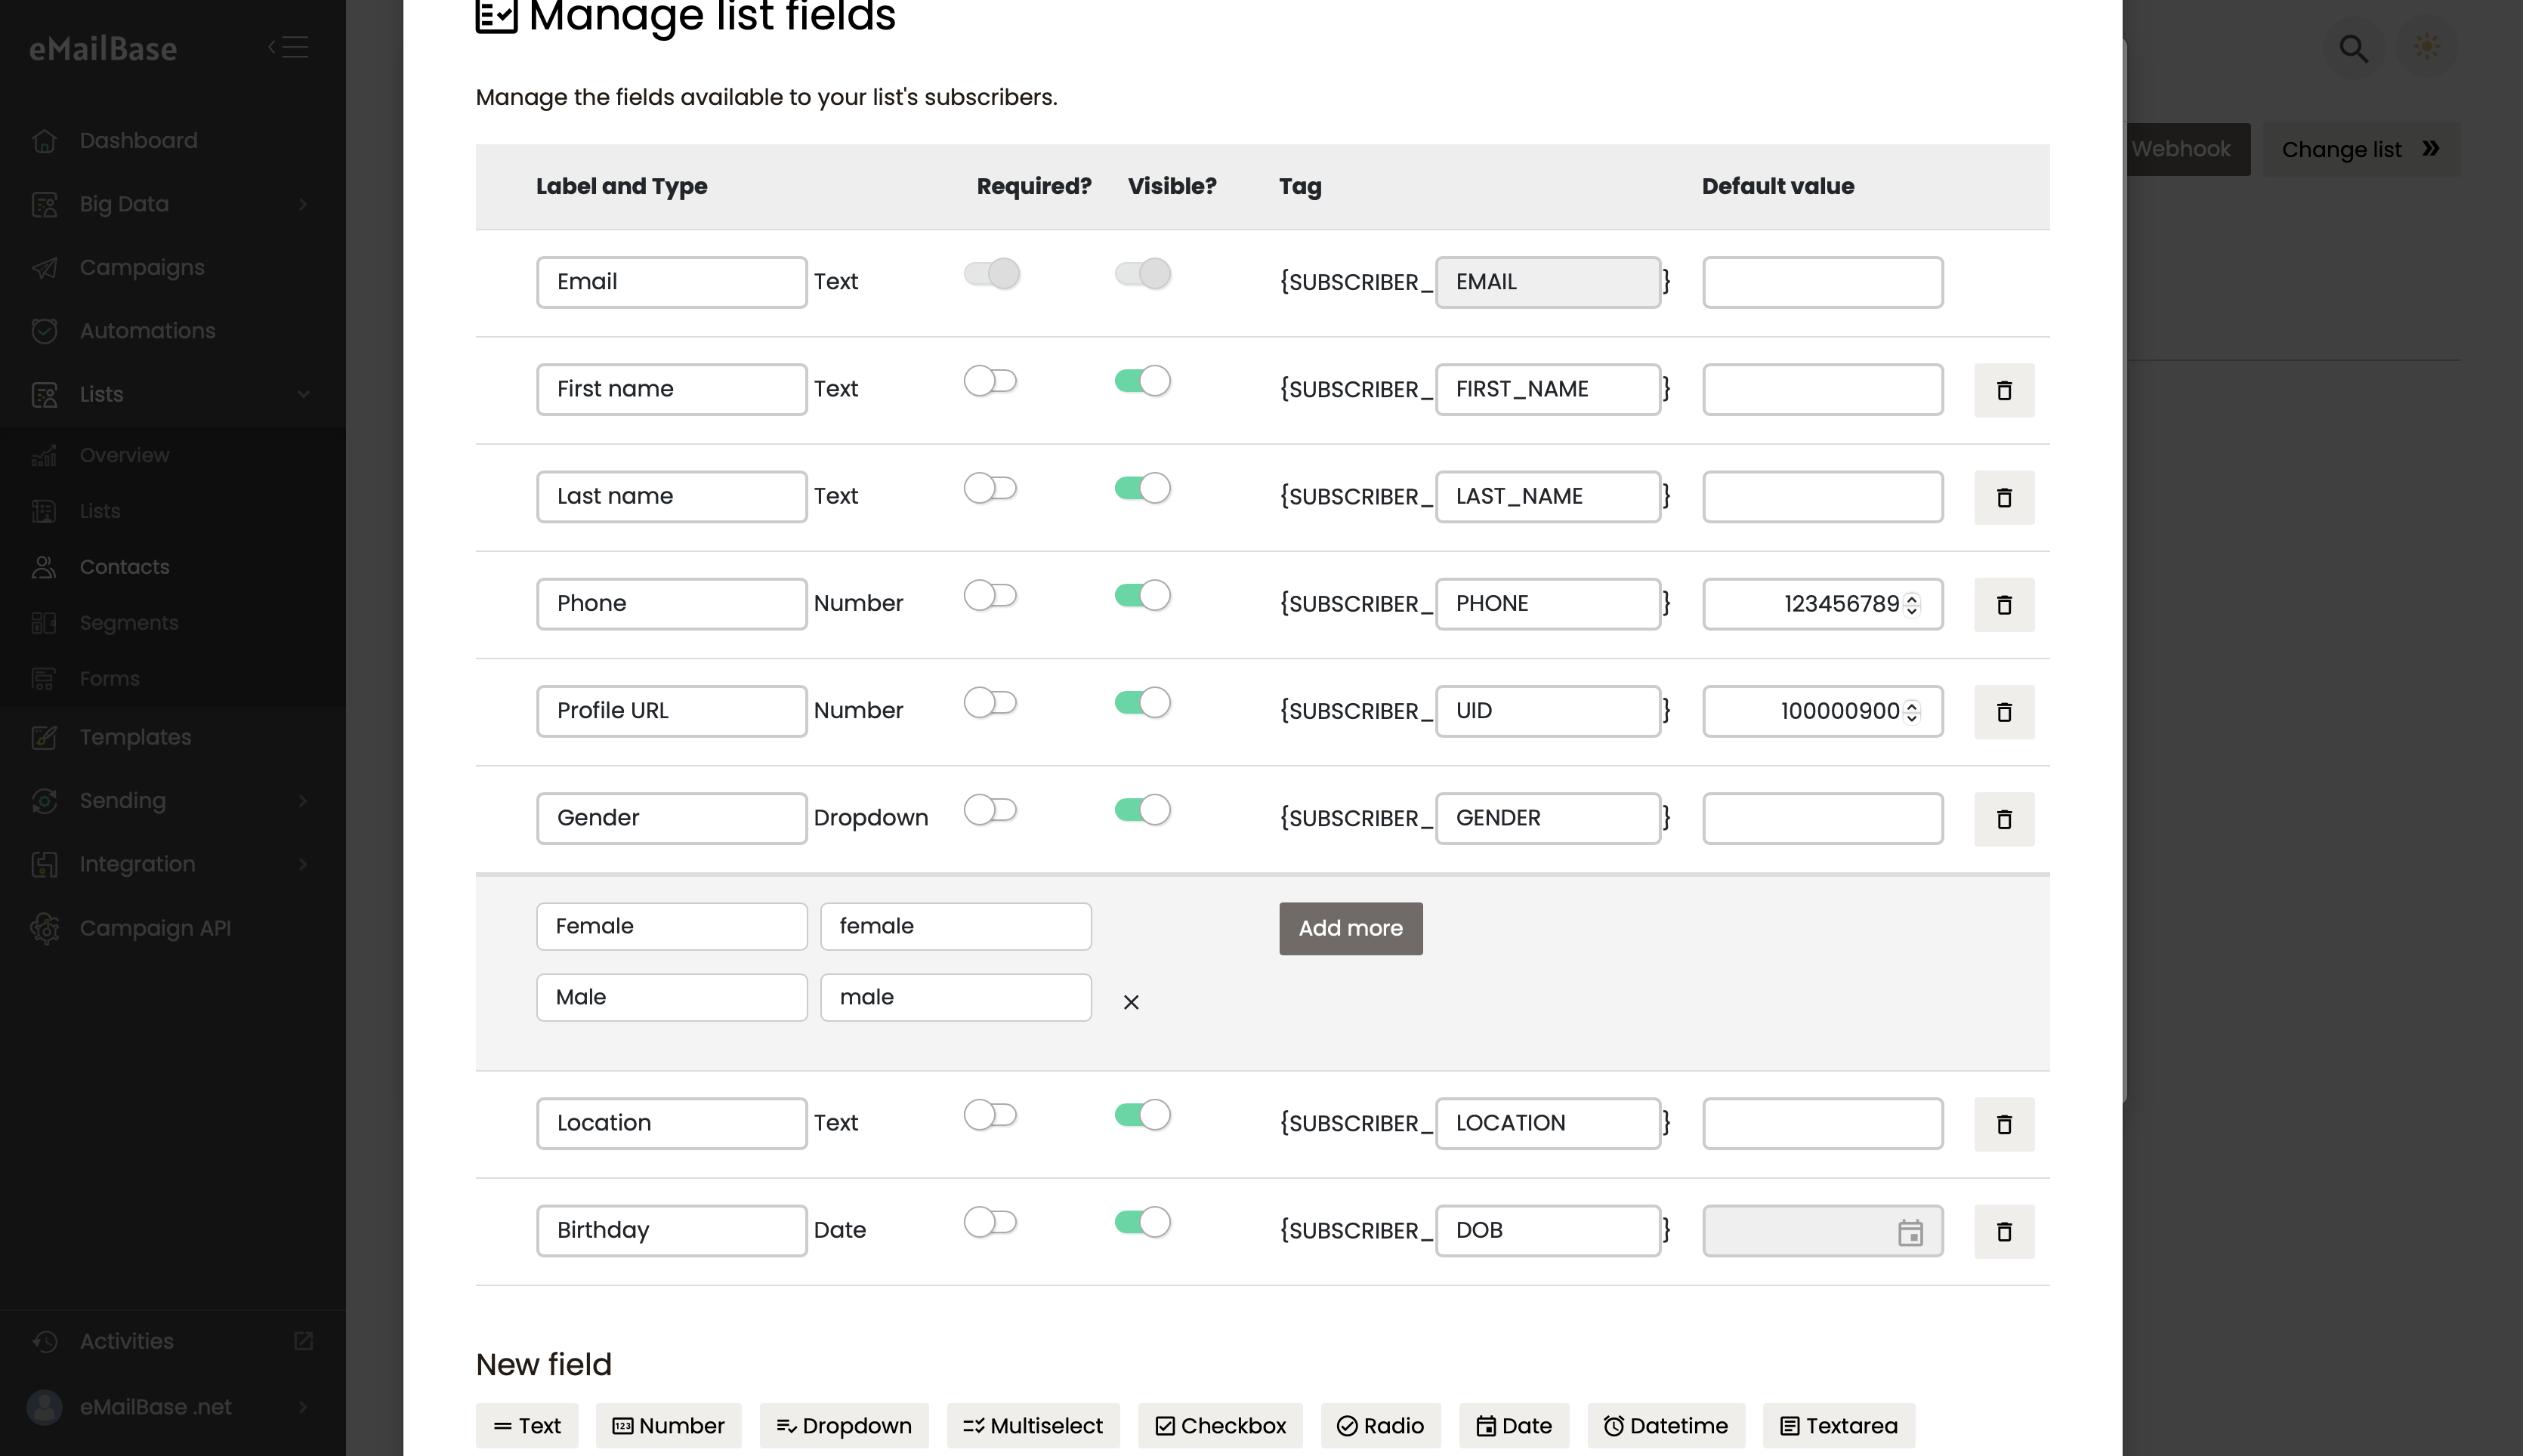
## **Step 6: Manage List Fields (if necessary)**
* If the necessary fields don’t already exist in your list, select **Manage List Fields** and create new fields as per the instructions provided in the [**Manage List Fields**](https://emailbase.gitbook.io/english/basics/list/manage-list-fields) guide.
## **Step 7: Verify and Complete Setup**
* Review the imported fields and data to ensure everything is properly aligned for your campaign.
* You can refer to screenshots for setting up the fields in the **Big Data** section to match the structure.
By following this process, you'll be able to seamlessly gather and import targeted audience data into your campaign lists, ensuring your marketing efforts are aligned with your desired demographics.
---
# Agent Instructions: Querying This Documentation
If you need additional information that is not directly available in this page, you can query the documentation dynamically by asking a question.
Perform an HTTP GET request on the current page URL with the `ask` query parameter:
```
GET https://emailbase.gitbook.io/english/basics/bigdata/social-data.md?ask=
```
The question should be specific, self-contained, and written in natural language.
The response will contain a direct answer to the question and relevant excerpts and sources from the documentation.
Use this mechanism when the answer is not explicitly present in the current page, you need clarification or additional context, or you want to retrieve related documentation sections.